Tuesday, September 30

Low Light Photography and Practical Light Effects, Guest Tutorial Tuesday!

Hey guys, Simon Liu was kind enough to let me share a tutorial of his on the blog. In case you don't know him, Simon is a TBB Blogger, the founder SHIPtember and The Micro-GARC Coordinator.


Low Light Photography and Practical Light Effects

Warning, this is not for the faint of heart, many of these results can be done by simple photoshopping, and it might be much faster. But do you get a better result? That's up to you, but I believe if you can do it for real, it looks that much more real (or even surreal).
Let me preface and admit that I am not a photographer, I have never studied photography, and while I'm somewhat familiar with the concepts and science - I am by no means an expert. What I am is lazy - I know the bare minimum to get cool pictures. So what does that make me? I would say I have practical experience. I have a bag of tried and true tricks that have historically worked for me. The object of this tutorial is not to talk about the theory of low light LEGO photography, but to share my practical tips and a layman's how-to guide to shoot in the dark.

The power of presentation


Sorry, I can't help myself featuring another Guilds of Historica build. This creation by Patrick Massey (Mass Editor) shows just how much presentation can impact a build. The build  is brilliant by itself, but in this cinematic shot with a great camera angle, lighting, and the help of a fog machine, it's clearly brought it up a notch to something that could easily be a movie still. 10/10.


The bustling streets of Kaliphlin


Over the last couple of years Guilds of Historica have brought many great builds and builders. this latest build by Jonas depicts a fantastic scene of a busy street in the fictional city of Barqa. the composition and textures are something not often built in the castle genre, but they are extremely effective. Instead of  the typical stand alone wall or building, he's put them together for a realistic looking scene, and the use of colour is superb (bar the lack of contrast of the tan ground-wall, really the only thing i can find about this build that I don't like). It even lights up! truly a masterpiece. 
If you haven't already, check out his photostream here!

Sunday, September 28

DragonSpace

Josiah has dramatically escalated the age old conflict of the Lego animal kingdom with his new DragonSpace build. I was really drawn to this build, even though it took me a few seconds to realize it was piloted by a dragon. I like the dynamic pose, somewhat industrial look and the awesome dragon helmet made of skis.It's a pretty difficult subject to photograph, mostly because of its stubbiness combined with its massive weapons. The low contrast black and dark gray color scheme reinforces the industrial vibe, but the lack of differentiation between different parts of the suit again makes photography tough. Josiah credits Messymaru for the photos, and I think he did a good job on photographing a difficult model, particularly in the two pictures presented here.

Thursday, September 25

MOC Photography: Lighting and Editing

There are several helpful MOC photography tutorials on the web, but they are widely scattered and can be hard to find. Additionally, they each cover slightly different subject material and use different techniques. This post is an attempt to consolidate and organize them all into a single post.

1. Lighting

First up is Larry Lars' 3-part lighting tutorial, which cleverly uses a small vignette to show his lighting setup.
  
Next, we have Legohaulic's lighting guide, which is part of his 5-part lighting and editing tutorial series (continued below).
Now we will look at editing.

Wednesday, September 24

Trans Orange makes things look deadly.

Think Ice Planet. Think about trans orange saws and snowshoes. Think about space.


This dropship by Lu Sim is making me think I want to go build a spaceship, regardless of just having spent the last month building one for SHIPtember.

[DROPSHIP] Himinioðurr

The use of trans orange inside intakes for... Air? Space?, is an idea I wish I'd come up with myself.
It's not very often that a space-ship just looks evil, but the angles and glowing orange makes this ship seem like something from another galaxy. One with sharp pointy things to remove your eyeballs from your skull.

Tuesday, September 23

Tutorial Tuesdays, Minidoll Outer Frame.

Now that we've learned how to build the Mini-doll frame in our first tutorial, we need to cover it with the outer shell/clothing.

In this tutorial, you'll learn how to do just that!
Read on...


Monday, September 22

Achieving the Maximum Parts-to-Cuteness Ratio

Sometimes it only takes a little to do a lot.

This MOC (can you even call it that?) by -derjoe- demonstrates how much expression you can get out of just four LEGO pieces. I can imagine making up all kinds of hilarious scenarios just by changing the captions.

This little skid-steer loader by hajdekr uses a few more parts, but isn't any less cute for it.
I can just imagine leaving this little guy on my desk all day, and coming back to find all my 1x1s sorted into neat little piles.

It's A Good Day To Die

Or at least to have a serious medical problem. I think it would be worth it if you could get a ride in this.


Lino M, master of all things with four wheels, has done it again. The simplicity of construction and amazing overall design are remarkable enough, but Lino also kindly cited his source material; Tom Daniel's Vanbulance for Monogram.


A quick google search reveals the brilliance of the adaptation. It's highly accurate, but it doesn't look forced at all. This is a great insight into how experienced builders use their visual libraries to inspire and refine their Lego work.

For those unfamiliar with the windscreen he used here's the Bricklink entry.

Sunday, September 21

Aptera


BZPower member Brickeens has built an insect guy! I really like the simple color scheme and the consistency of the lime aesthetics. Brickeens has always been a master of silhouette, and his latest build is another success. In this model he contrasts the thick and thin parts of its' anatomy along with the bold lime spikes to make it unique. He says in the BZP topic that he will be adding insectoid wings to the model soon, which should be a great finishing touch.

Friday, September 19

Graphic Design and LEGO

Josh Derksen, (armouredgear7 on Flickr) is no stranger to mixing graphic design and LEGO. He's done everything from display enhancements to board games to posters.

For SHIPtember this year, Josh has decided to step things up a little with some custom console stickers for the interior of his SHIP.
Josh explains his process from the computer to the finished product:
Artwork:
300dpi is ideal. You might get away with 150-200 if they're photographic, but I don't recommend it. I actually did these in Illustrator, so they're vector and I get excellent clarity in the 600-1200dpi range (depending on the printer).
Size:
Basically a 1x1 tile is 8x8mm, and every sticker LEGO makes is 1mm smaller than the intended application all the way around the edge as a safe zone. Therefore, a 1x2 tile is 6x14mm, 2x2 tile is 14x14mm, 2x4 is 30x14mm. Makes them easier to apply.
Cutting/Assembly:
I set up my file with all the stickers butted up against each other, and I draw in crop marks for each row/column. I use an xacto knife and ruler to cut them out, which results in each sticker having its own backing paper. This is a little tedious to cut and apply, as it leaves no room for error if you mess up the cuts. You may want to add space between your stickers and give each one its own crop marks. I probably have way more experience cutting paper with a knife and ruler than most people - a four-year graphic design degree will do that - so I tend to take shortcuts.
Sticker Paper / Where to Print:
I have a really good printing place near my office in Toronto called TPH that will do a glossy or matte 12x18" laser-printed sheet for about $2 CAD. That is a huge number of stickers. They do clear as well, but I've heard from Halfbeak (when he did his Circorp logos) that only the black ink is opaque enough to look nice. I think Staples sells inkjet sticker paper in 8.5x11" sheets, and I've used them before with decent results.
Josh also mentioned that he is considering taking commissions for custom stickers. Hmm...

Tuesday, September 16

SHIPing Done Right

Thinking about building a SHIP? Well start taking notes, because this is how it's done.

I'd like you to meet the Hurricane Battlecruiser, by Tim Schwalf (One More Brick on Flickr). Built in just 14 days, this thing is 155 studs of pure SHIP brilliance. 
Like so many good SHIPtember entires, Tim's design is based on a piece of concept art. The design is from the game EVE Online. If you are ever looking for a spaceship design to build, the concept art from EVE is a great resource.

The busy greebled areas make a nice contrast against the flat blue panels. And what beautiful greebles they are.
And what's a good SHIP without a squadron of defence fighters?


How To Achieve a Strong SIlhouette, Tutorial Tuesdays

Definition: The outline or general shape of something: "the slim silhouette of a skyscraper."
Silhouette is important. In fact, it may be the most important factor in determining how striking a build is. Because of this, silhouette should be considered from the concept stage all the way through to adding the finishing touches.

All of these images link to the originals, so to see the non-blacked out version just click on them.

A Well Aged Creation.

Some MOCs stand the test of time well, and some don't.

Jack McKeen's Sazabi gundam sat in storage for seven years, and after rescuing it from the darkness, it was a bit of a mess.
Yayyyyy!!!!


Fast forward several months, and many, many headaches later (I assume), the beast once again stands under it's own weight.

SazabiProgress

I like this model for a plethora of reasons, the main ones being the fact that it's a three foot tall, bright red robot, and the fact that the external plating and body is mostly unchanged from the original model.

With the pieces we have today, and the amount of mecha builds already online, there's a lot of inspiration and skill to pull from for our builds.
The bar has been set pretty high for mecha by the likes of Izzo, and Brian Kescenovitz, but this monstrosity stands the test of time.

Regardless of old techniques and pieces, some MOCs just have a flair that you just can't deny.

Monday, September 15

Extreme Custom Decaling


Carl Greatrix strikes again, with another hyper-realistic model. He's completed one Phantom F4 and is near completion on another variant.


His decal usage allows him to achieve a level of detail and accuracy that would otherwise be impossible at this scale. My purist tendencies are honestly overwhelmed by the sheer brilliance of the effect.


Jon Hall, also a decal using veteran, also revealed one of his signature Sky-Fi builds today. It's interesting that Jon uses the same decaling technique as Carl to lend a feeling of realism to his otherwise fantastical models.

Sunday, September 14

Character

Pate-Keetongu has created another memorable character, Womba the Stalwart. The actual build seems relatively simple, but the expression combined with the stumpy legs make for a striking personality. Conveying character is often more valuable than building prowess, though Pate happens to have plenty of both talents.

I'd also like to point out the slick part combination used for the head of the staff. And I was unable to find the shield part on BrickLink, but, wherever it's from, it's epic. (EDIT: Here it is, thanks Ben.)

Friday, September 12

Building a Strong SHIP Frame

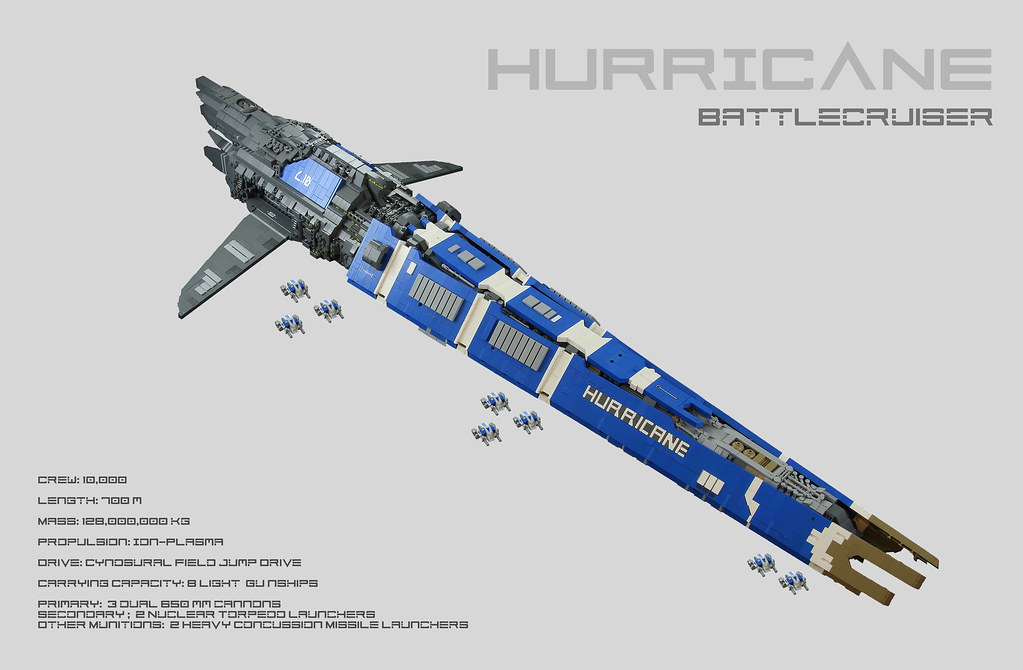
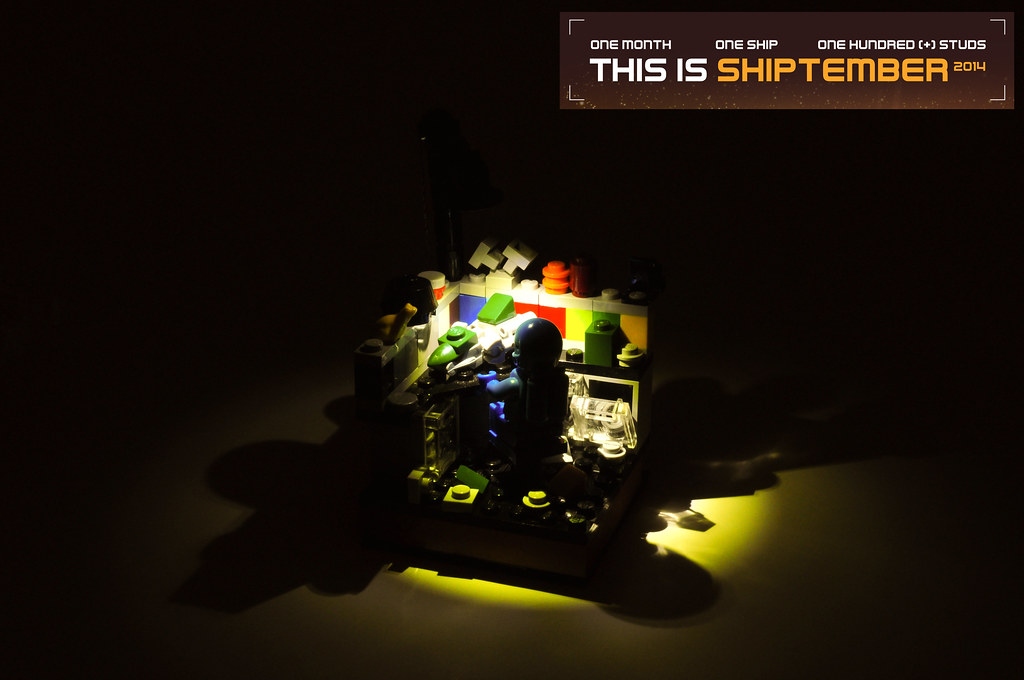
Few can resist the allure of SHIPtember. Maybe it's all the amazing WIP pictures popping up in your Flickr feed. Maybe it is the prospect of fame, glory and a cool trophy. Maybe the idea of trying to build a SHIP in one month is so crazy that you have to try it at least once. 

In any case, you've decided to dive in. If you are a first-time SHIP builder, or even a seasoned veteran, the idea of building 100(or more) studs of pure spaciness might seem a little overwhelming. But don't worry, it's really not as hard as you think. The key to building a good SHIP is to start with a solid and sturdy frame. Once you have a frame to serve as a solid foundation, the rest of the SHIP will come along much easier.
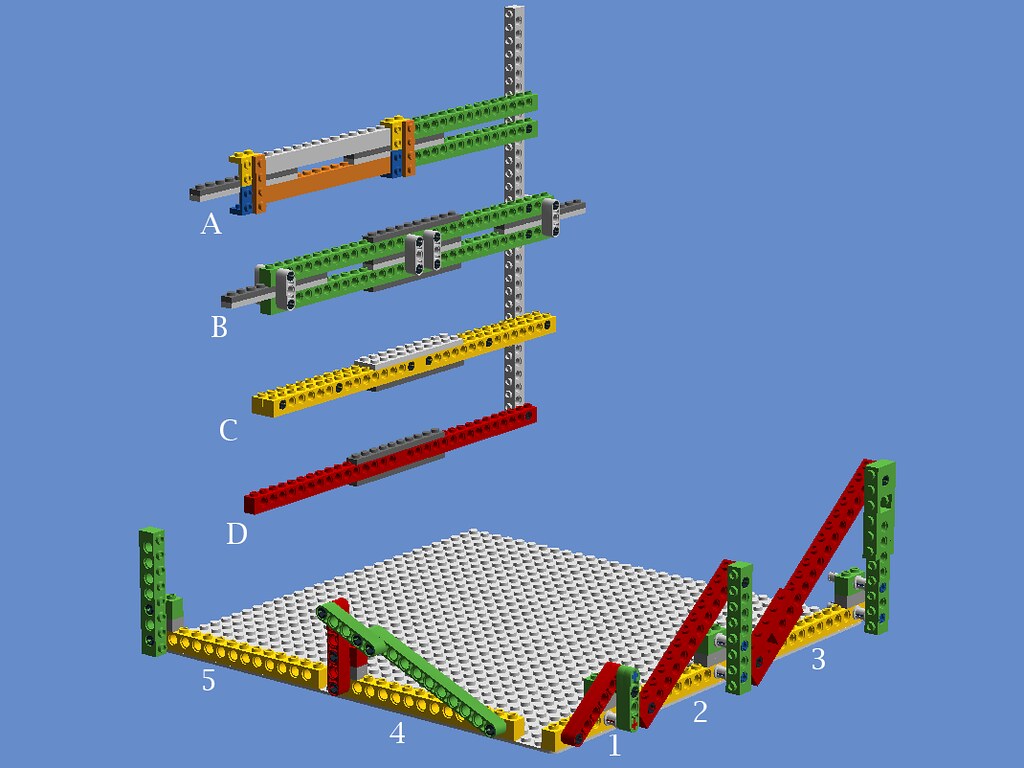
Huib Versteeg (space_e on Flickr) has put together this very helpful illustration of a few different frame techniques. He was even kind enough to share the LDD file if you want a closer look.
In his own words:
"A-D are beam designs, where D is the weakest, least stiff, most wobbly in the up-down direction, C is about twice as stiff as D, whereas B is about 8 times as stiff as D. B and A are comparable, where A can be made without any technic parts.

1-4 are just general standard Pythagorean Triple 
triangles, with 1-3 being different scales of the 3/4/5 triangle and 4 being a 5/12/13 triangle. Adding truss type structures can be overkill, but if you're adding a lot of weight it may be worth it."

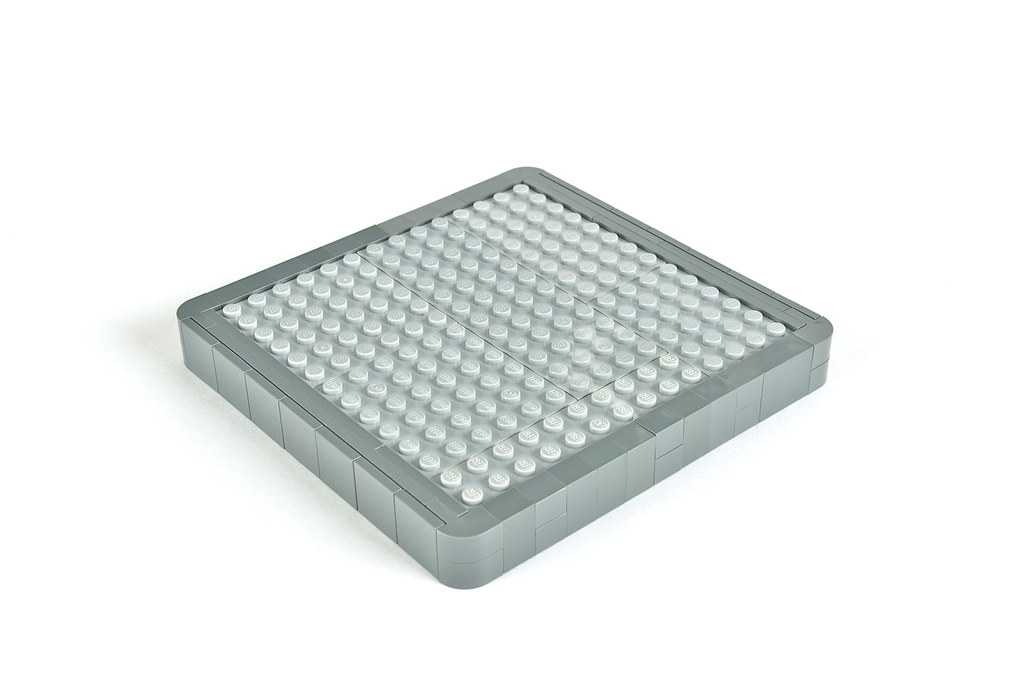
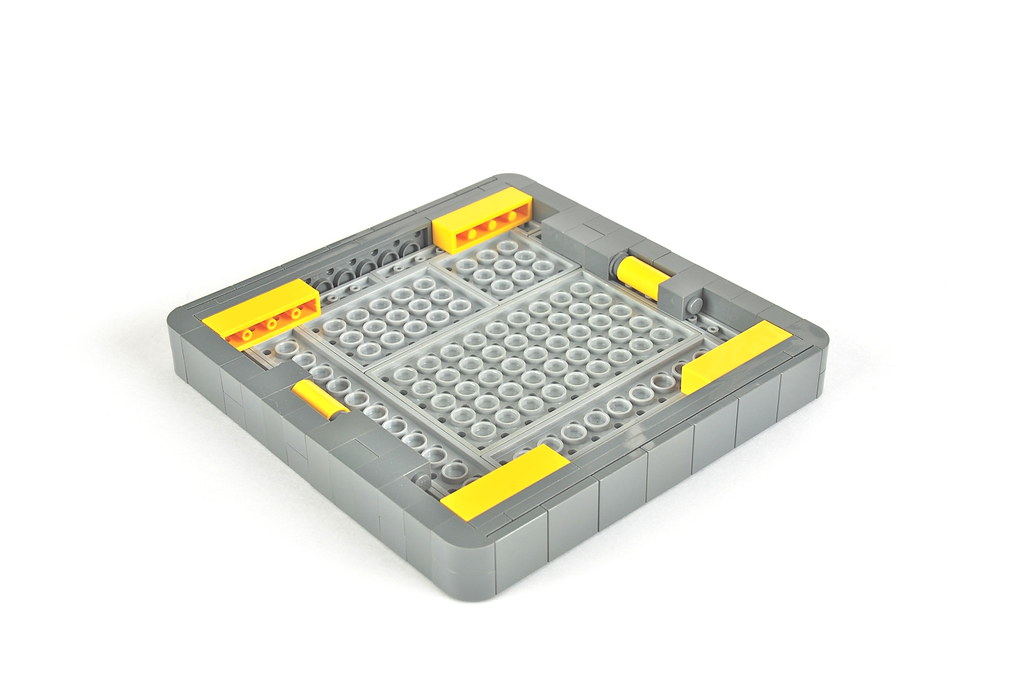
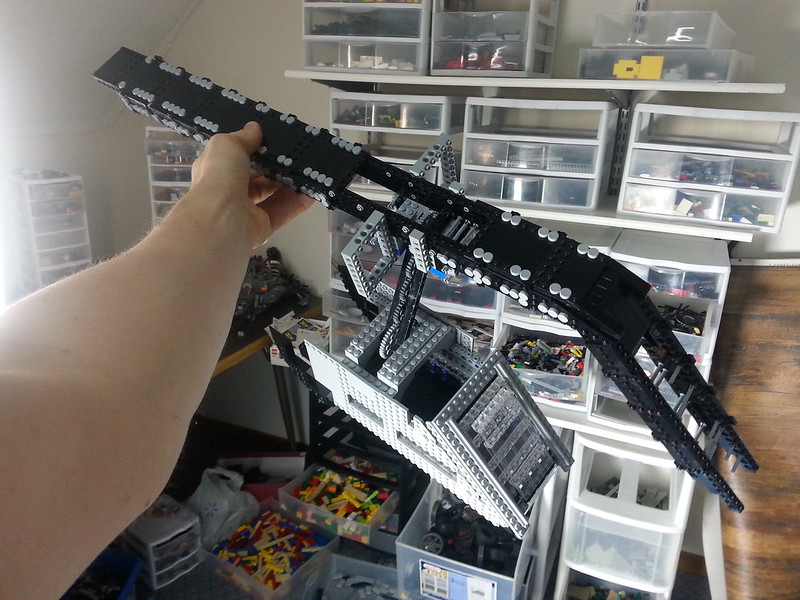
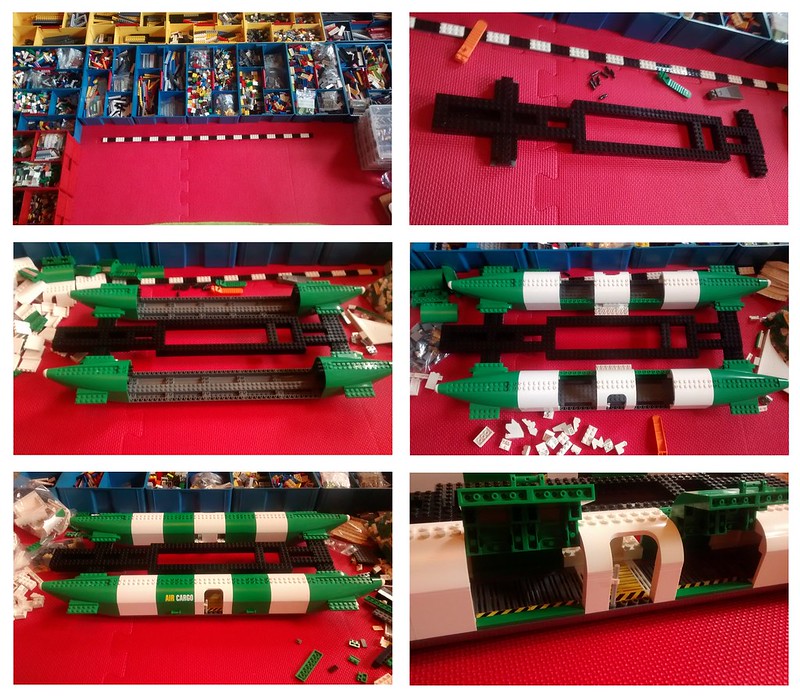
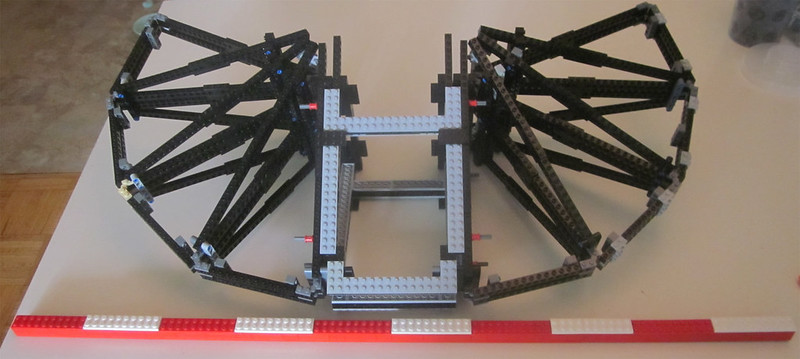
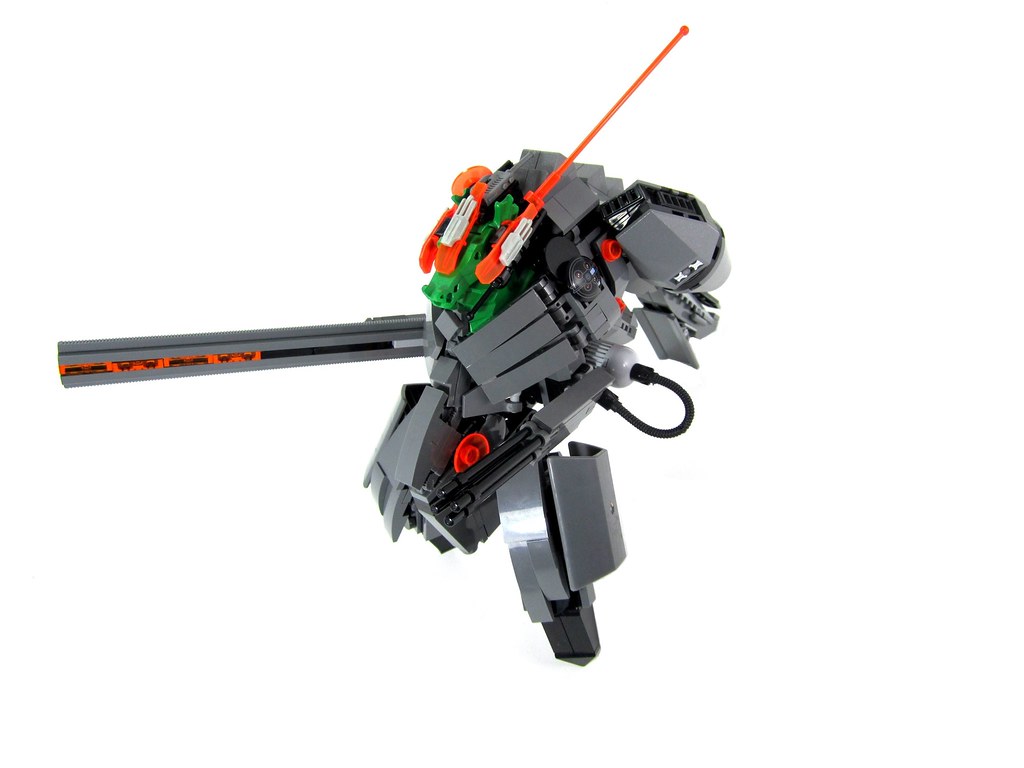
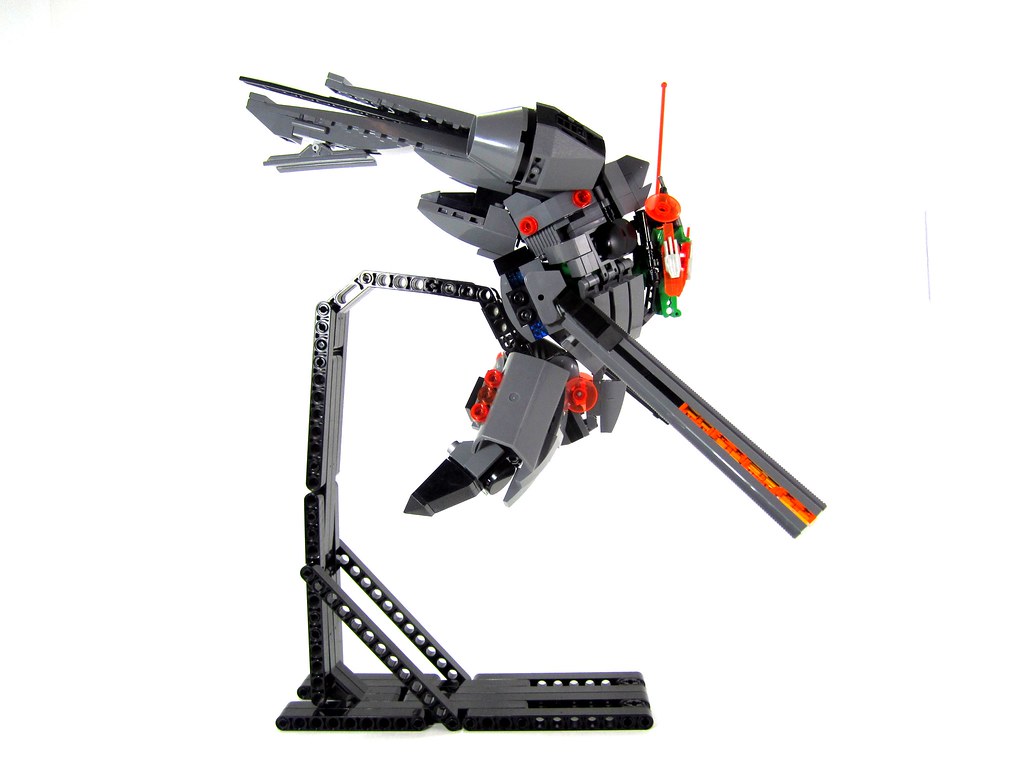
I put together this test frame to illustrate how these techniques can be put to use. (Here is the LDD file.)
This is of course just one example of you how can do it. This particular frame is super strong and could hold a lot of weight. Like Huib said, adding too many trusses is probably overkill, although it can help you achieve certain shapes. Depending on how many Technic beams you have, you may also need to modify it to use more regular bricks, for example by using beam design A.

Now get off the computer and go build a SHIP!

Wednesday, September 10

From the Far Reaches of the Internet...

While the majority of builders in the online FOL community reside on Flickr and MOCpages, occasionally you run into builders on other sites that are producing some very high-quality builds.

These Star Citizen models by RSI Forums user Scornshell are an excellent example. Not only is the render quality and presentation top-notch, but the quality of the builds themselves is very good. 

On a related note, there is a Star Citizen Hornet project on LEGO Ideas that has garnered a pretty significant amount of support. Be sure to check it out and give it a vote it if you would like to see a official LEGO Star Citizen set become a reality!

But wait, there's more! 

Scornshell has not limited himself to just one game. He has also produced some equally high-quality models from Elite: Dangerous and HAWKEN. Follow the image links to see more of his work from each game. 


Tuesday, September 9

Tutorial Tuesdays; Minidoll Frame.

Some of you followers of this blog may be familiar with my Minidoll concept that I've been developing over the past few years.

With the official launch of Lego Ideas, and the submission of said Minidoll frame, I figured it was time for the masses to finally get to see what techniques these things are made of.

With that, I'll be diving into a very image heavy post, so brace yourselves!

Monday, September 8

Believably Sci-Fi.

Within the online Lego community, there's a contingent of builders that like to build accurate military creations from source material, and then there's the non-source builders, who manage to make fictional military seem just as real as the source builds.

David Steeves' latest mech falls into the latter category. Sci-fi by name and aesthetic, but I find it totally believable that we could see something ike this cruising around our battlefields in the very near future.

GroundHawk

From a building perspective, the MOC is fairly standard as far as Sci-fi military goes, Dark Bley color-scheme, with bits of black for detailing, and of course a caution stripe to make things seem believable.
What caught my eye on this build was the large Technic motorbike tyre inside of a prefab tank tread, which appears to be powered by an even smaller tyre inside the main assembly.
With a brisling array of black guns to add a bit of visual interest, and break up the monotonous Bley, this MOC is a surefire winner!

Sunday, September 7

It's Radioactive, Ra-di-o-act-ive!

Xccj is ahead of the game with SHIPtember. ...Unlike some people.


I really like the restrained color scheme and the (relatively) simple pitchfork shape. Because there are only two colors, the scattered pattern of the Trans-Neon Green really works.

And the glowing. That's awesome too. He's planning on displaying it in World of Lights at BrickCon, and it's going to look stunning. Keep up the good work, Jason!

Friday, September 5

The Wrath of the Aztecs


Messymaru has been building mecha for awhile, and he's gotten pretty good at it. I really like his focus on the major shapes in this build. The contrast between the bulky hips and slim torso, the massive hammer and of course the awesome array of concentric circles on the back. These kinds of things really help a MOC stand out, especially in thumbnails and when viewed from a distance.


On the negative side, I think the colors are a little off. The sprinkling of red/trans-red doesn't add much to the build. I'd rather have seen a new color used for the large gray armor plates, which would improve the layering. I suspect Messymaru has a limited collection, and is consciously sacrificing color for shape. The builder's use of gold is on point though, he reserved the color exclusively for the outermost layer.

An iconic build by a talented builder. Aztec mecha is a pretty cool idea (he credits J Sam as inspiration) and I hope to see more.

Thursday, September 4

Simplicated.

We're all very familiar with those horrible floppy stair pieces that the Lego designers are so fond of sticking into castle sets these days.

AFOL community cheese slope mosaic master, Katie Walker has opened my eyes to the usage of the stair piece in a new and exciting way.

Stairs

By flipping those terrible parts upside down, Katie has achieved a container that can now house one of her wonderful mosaics.

It's this sort of thinking that BLaB is all about. Using a very underused part, Katie has achieved something that benefits the entire MOCcing community, and once again, furthers our understanding of how these tricky little bricks fit together.

Wednesday, September 3

Now That's Podracing

Jonas is pulling no punches in the FBTB Steam Wars contest. I'd like to point out the technique of layering 1x4 panels to make a shingled roof, and the use of cut flex tube for free-standing lettering. I also love the simple use of white brick for the billowing smoke, it gives it kind of a Lego Movie look. Possibly my favorite element here is the mechanical version of the Dewback, I wish the builder had included a detail picture of it.

I'm really impressed by the thoroughness of this build. He really built three separate good models, and they combine into a more believable and striking scene than any of them would have been by itself. Ironically, my main criticism of this build is its presentation. With such a large MOC there's no reason to show the edges of the baseplate and break the illusion of reality. The white background and high angle view compound the problem. A low angle camera view, concealment of the edges, and a darker/more realistic background would have transformed this from a great build into a memorable world.

For more mind-bending Steam Wars awesomeness, head over to FBTB.

...Is That a MOC?

Sometimes, I honestly doubt that Lego designers know what they're doing. I mean, seriously? We've all had that moment. But then, a set like this one emerges...
...And my faith is restored. But let's be a little more analytical than the reflex fanboy reaction.The colors are beautiful; the combination of dark green, sand green and light gray gives it the awesome weathered appearance of the original. The contrasting warmth of the dark red makes it very visually appealing, while keeping a feeling of realism and practicality. The texture of the studdy sides is a great reminder that studs are nothing to be ashamed of.

The extraordinary faithfulness to the source material really sets this apart. The designer went the extra mile to achieve the complex curves, and it definitely paid off. The new cockpit is perfect for this model, but its' size and somewhat blobby shape may make it difficult to use elsewhere. I kind of prefer the somewhat angular aesthetic of the old cockpit, at least for MOCs. I have my doubts about the stickers in the set, they do lend a higher level of accuracy, but they sacrifice some of the Lego feel of the model. I guess a sticker rant would be its own post for another day. Also, I can't figure out how the fins swivel, considering they're connected by two technic axles; perhaps someone can help me out in the comments.

Until then, enjoy this amazing preview of a very high quality set by an extremely talented designer.

Tuesday, September 2

Building a Simple but Elegant Base

Sometimes presentation is half the battle. You've just built a beautiful vignette, but now you need a base for it! Now of course, you could just make a simple square one with plates and tiles. Boooring. Instead, build one like this!
This is a design I developed a couple years ago for microscale space scenes. But it would work just as well for a castle vignette or really any other type of scene. While the example shown has a 14x14 stud build area, the design is easily scalable. You could shrink it down as small as 8x8 (or possibly even smaller), and as large as your heart desires.


Here is how it's constructed. The bottom shell (the dark grey part) is basically comprised of two halves, each with studs facing in the opposite direction. In order to make them fit together, a Technic connector (yellow) with 1/2 pins is sandwiched between two 2x2 corner bricks. The top plate layer (light grey) is then attached using 1x4 SNOT bricks (also yellow).


Thanks to the extreme flexibility of our favorite interlocking plastic brick system, there is usually more than one way of achieving a certain shape or function. Tyler Sky (Bricksky on Flickr) built an almost identical base using a slightly different technique.


And finally, here are a few examples of the base being put to good use.


Monday, September 1

Aaaand they're off!

SHIPtember is upon us!

A monthlong build challenge that spans the month of September. The goal? Build a SHIP (Super Huge Investment in Parts), of 100 or more studs.

The WIP shots are coming in fast and hard, and we've got some doozies already.

Uspez gets fancy with some gear stabilizer action. No sure what those 1x1 round tiles are for, but I'm jealous nonetheless.

SHIPtember WIP!!  Long nights are coming


Karen dives into a SHIP that looks positively aquatic, making good use of an otherwise useless part.

WIP it real good!

And to wrap it up, Armoredgear7 does mind-blowing things with technic rods and hinge plates.

SHIPtember Day 1 (5 Hours)

Keep your eyes peeled for more SHIP-WIPs in the The SHIPs, WIPs and Discussions group!

Unidentified Builder Incoming

 Christopher Hoffmann achieves escape velocity with his first MOC posted on Flickr, 24. Notice how careful his part usage is. The orange pieces are all 100% faceted, as are the gray parts. He then gave black more freedom and the curves of those pieces complement the angles very well.

Don't even bother asking if it fits a fig. Or course it does.